Motorola CP200 Basic Programming
How to program the Motorola CP200 two way radio.
So go ahead and okay that and then what we’re gonna do is go aheadand power on the CP200 radio and then at the top here we’re going to read the radio.
Now you should see this progress indicator here and its just pulling all the informationoff of your radio.
Make sure you have a fully charged battery so you can get a full read off of the radio and now we have a general a breakdown of everything that’s in the radio so going down line here it’s giving us the model number the CP200.
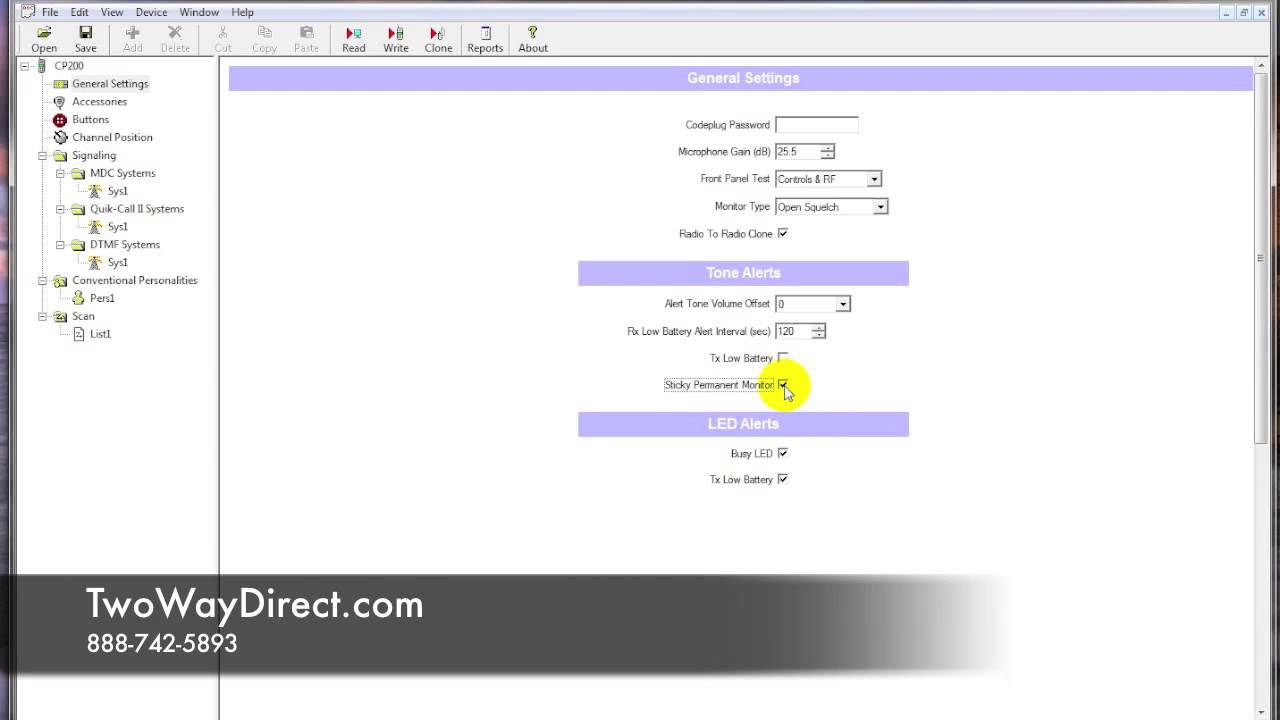
You can see it’s a UHF 16-channel serial number the firmware version as well as the frequency information now over on the left hand side hereanything you click here is gonna automatically be populated on the righthand side here so we’ll just go down line hereand explain some basic settings if you don’t want anyoneto have access to your radio via the programming software and cableyou can always put in the password and they will be prompted to enter thatpassword when trying to read your radios if you want to control and who has access.
You can always put in the password here but makesure you do remember that or else you will be locked out yourself and then there’ssome basic some other settings here that Itypically don’t recommend changing as they’re good at the default settingssuch as the microphone gain, how loud you want that to be as well as monitor type: front paneltest do not change that, and then you can have some tone alerts.
If you have a low battery you canhave the radio beep at you.
I normally turn that off because it can bepretty annoying if you’re trying to finish off your shift with a low battery and you’re still talking to people and you have that beep going off.
It’s really not helping anything and youknow you have a low battery if you’ve been using it all day.
I typically turn that off as well as a any of these other tones here they can justbe a little bothersome because as you can see down here you still have these LED indicators thatwill tell you if your radio’s busy if there’s radio traffic or if there’s alow battery you’re gonna have it flashing at you anyhow.
So I always turn the tone alerts of unless you want to really idiot proofthe radios then of course you can have those turned on.
Next thing here is accessories this here is normally just for ifyou’re plugging in a vox capable headset you would change all your informationover here but only for vox capable equipment.
Next option here is for the two option buttons as you can see on the side of the radio underneath the push to talk button on the side of the radio and as you can see here the long pressduration, this is measured in milliseconds and that’s for the long press on sidebutton 1 and a long press on side button 2.
So ifyou want to make sure that your employees have to hold the button downfor a good few seconds you can change the duration hereby clicking up or the down and then within easy can select several settings if you click the drop-down you can seethere’s monitor toggling between high and low power toggling between your repeater pair aswell as the talk around and then activating scan and deactivatingthat and also tightening up and loosening the squelch and also that vox operation for the headset.
You can turn that off with an option but if you’d like and you can also set these to unassignedwhich in a lot of circumstances we will do for new customers that don’t necessarilyneed a lot of features.
We’ll set all these to unassigned so if the buttonsinadvertently get pressed nothing will happen to the radio butwithin these, the most common things that we’re going to use for your for our customers is scan so that’s all done through here but as you can see a number of otherfeatures that we’ll get into you at a later time.
Scrolling downhere we’re gonna go to the meat of the programming for now.
So we’re gonna skip this more advanced section with the signaling.
We’ll do a video on that much later but we wantto focus on the conventional personalities within theradio so as you can see right now thearchive that we read there’s only one personality which meanschannel within the radio and clicking here this will bring up allthe information on the right side of screen of what’s onthat channel one and what we can do here is there’s onlyone channel so we wanna expand this because we wanna do a 16 channel radio.
So we’re gonna begin hitting the plus button and you cansee on the left hand side the personalities are totaling up to 16now.
So now we have activated 16 channels on the radio so if we click on each of these, it’s gonnashow you all 16 new frequencies now I’m gonna go back to channel onestarting at the top here channel bandwidth due to FCC regulations everything has to be twelve and ahalf kHz now and actually defaults that so definitely don’t want to select 25 kHz anymore we gotta stick with the twelve and ahalf so go ahead and select that there now if you want this channel to bewithin a scan list that we would set up on these options ones here you’re gonna wanna make sure that you select list one whatever information you put in here youcan actually hit copy and it will auto-populate on the other side so let’s say we had a new frequency of 465.
5 and let’s see if we wanted to DPL intheir and we’ll leave it at 023.
Now as you cansee it has an auto populated area.
You gotta make sure you hit the copy button here that’s gonna input everything on theother side now if we have a repeater we’re gonnahave to change one at these frequencies so in that circumstance I would change thisto whatever desired frequency the repeater is on this side so you cansimply type in whatever you need their and it’ll stay in there.
So scrolling down here also wannatouch on on the squelch type here.
So you have your choice of no privacy tones what’s called the a DPL or a TPL.
Within these you can make various choices on what sort of code you want Really no preference here.
I usuallytry to go in the higher levels just seems a little bit less common for those but always wanna put those in to just blockout some outside radio traffic so very important that you select those DPL or TPL there’s really not a huge advantage to select the one over the other so whatever you’re more comfortable withgo ahead and select that and always when you’re done, make sure you copy so everything is matched up side by side.
That’s basic programming for now on the CP200.
So I’m gonna goahead and click the right button and make sure your CP200 ispowered on and you’re gonna see a progressindicator on screen and everything was successful.
Anyadditional radio that you want to copy to the same archive we’re gonna wanna hit the clone buttoninstead.
That’s basic radio programming there and we’ll be in touch soon withour next programming video here from Two Way Direct!.
Source: Youtube